Small rooms often feel tight, dark, and restricted, but the right mirror placement secrets can completely change that perception. Mirrors are not just decorative accents. When positioned with intention, they become powerful design tools that amplify light, extend visual lines, and instantly create the illusion of depth. A thoughtfully placed mirror can make a compact space feel brighter, taller, and significantly more open without any structural renovation.
The key lies in strategy. The most effective mirror placement secrets focus on reflecting something meaningful, whether that is natural light from a window, a hallway that extends sightlines, or an architectural focal point that deserves emphasis. Size, shape, and positioning all work together to correct proportions and improve balance. When done correctly, mirrors transform a confined room into one that feels seamless, expansive, and architecturally refined.
Mastering these mirror placement secrets allows you to enhance space, improve symmetry, and create dimension with precision. It is not about adding more mirrors. It is about placing them where they matter most.
Understanding Mirror Placement
When positioning custom-cut mirrors, aim to amplify natural light and extend sightlines: place a mirror opposite or adjacent to a window to boost lumen output by 20-40%, or align its vertical center at roughly 57-60 inches for balanced eye-level viewing. Match mirror width to nearby furniture-about 60-80% of a console or sofa-and leave 6-12 inches of wall space above surfaces so reflections feel intentional, not crowded.
How to choose the right mirror size
Pick scale by comparing mirror dimensions to surrounding elements: for entry consoles choose a mirror 60-80% of the table width; above a bed or sofa aim for 50-75% of the furniture width; a functional full-length mirror should be at least 48 inches tall to show most of the body. You can group smaller mirrors-three 16×24-inch panels mimic a 48×24-to fit irregular walls.
Factors affecting mirror placement
Light, sightlines, ceiling height and architectural features dictate placement: high ceilings allow taller vertical mirrors, low ceilings benefit from horizontal orientation to widen perception, and avoid reflecting cluttered views or direct bedroom beds if privacy is a concern. Structural limits like stud locations and mirror weight determine mounting hardware and clearance from doors or windows.
- Place opposite a window to increase daylight and perceived depth.
- Hang above furniture with 6-12 inches of breathing room for proportion.
- Angle slightly downward to capture floor reflections in narrow hallways.
- This improves perceived square footage and balances light distribution.
Dig deeper into sightline tactics: in a 9×10 ft room, mounting a 48×36-inch mirror opposite the main window can create a perceived depth gain of 25-35%, while grouping three 18×24 mirrors across a 6-foot wall gives rhythm without overwhelming scale. You should also test a 5-10 degree tilt for hall mirrors and use masonry anchors for heavy frameless pieces to meet safety loads.
- Use frameless panels to minimize visual breaks on small walls.
- Cluster odd-shaped mirrors to mimic an art installation and distract from size limits.
- Secure heavy mirrors with rated anchors and toggles for safety.
- This allows you to maximize impact without compromising structural integrity.
Maximizing Light and Reflection With Strategic Mirror Placement
You can harness mirrors to amplify both daylight and lamps: placing a full-length mirror opposite a window can bounce an estimated 20-40% more light into darker corners, while mirror clusters multiply highlights from a single fixture. Angled panels direct beams into alcoves and mirrored wardrobe doors broaden sightlines. Combine mirrored sections with matte paint to control glare and achieve an evenly lit, larger-feeling space.
How to position mirrors for optimal light
You should place large mirrors directly across from south- or west-facing windows to return the strongest daylight; even a 24×36″ mirror makes a measurable difference. Mount them at eye level or tilt the top 5-15° toward the room to aim reflected beams into darker areas. For artificial light, set mirrors beside or behind lamps-mirror-backed sconces boost output without added wattage. In narrow rooms, staggered mirror panels along the long wall distribute light evenly.
Tips for creating depth with mirrors
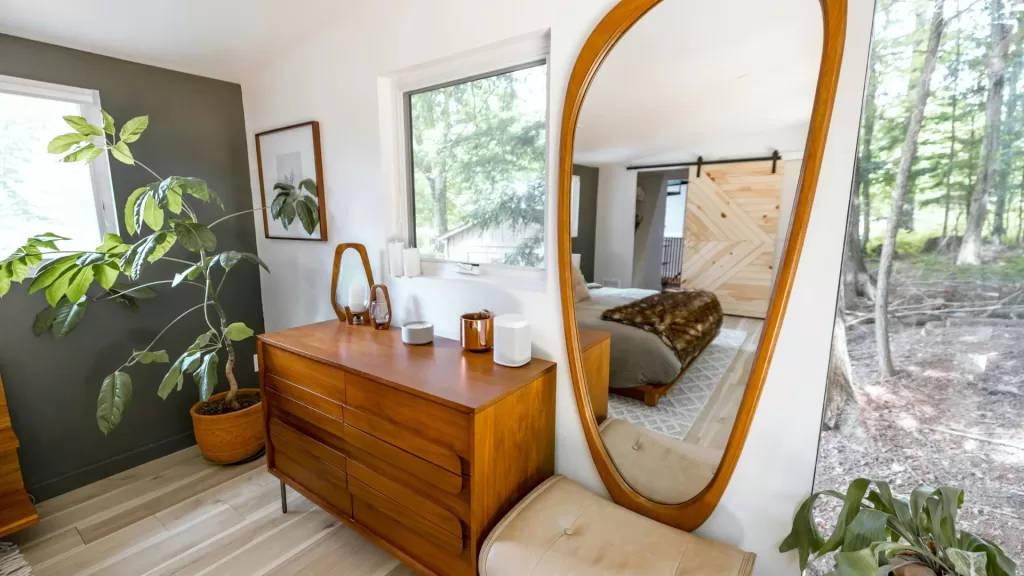
You can create depth by reflecting distant focal points: align a tall mirror to capture a window view or a decorative shelf, which tricks the eye into thinking the room continues. Use floor-to-ceiling panels or mirrored closet doors to establish uninterrupted sightlines; a single 72″ panel will feel more expansive than several 18″ tiles. Mix full mirrors with small, angled pieces to suggest layers of space without heavy renovation.
- Reflect a distant window or doorway to extend the eye-line.
- Install mirrors at staggered depths (e.g., 1-3 inch offsets) to create layered reflections.
- Perceiving space increases when you combine vertical panels with low mirrors near the floor.
To enhance depth further, you should place low mirrors-6-12 inches above baseboards-to reflect floor lines and make ceilings feel higher; combine with a 2:1 mirror-to-wall ratio on the focal wall for dramatic extension. Angling small mirrors 10-20° toward a window multiplies perceived layers, and mirrored furniture fronts add subtle depth without dominating decor.
- Use a mirror height equal to at least two-thirds of wall height for strong vertical pull.
- Place mirrors 6-12″ above the floor to double perceived ceiling height through reflected floor plane.
- Perceiving additional depth is easiest when you reflect a clear, distant view instead of cluttered surfaces.
Mirror Placement For Enhancing Room Aesthetics
You can use mirror shape, scale, and finish to reinforce your room’s style while increasing perceived space; for example, a single 30″x40″ vertical mirror on a 9-foot wall emphasizes height, while a 3-piece cluster of 18″x24″ mirrors creates a gallery effect and visually widens a 10-foot wall. Coordinate mirror placement with focal points-opposite a window for extra daylight or beside artwork to amplify texture and color.
How to select the style of mirror
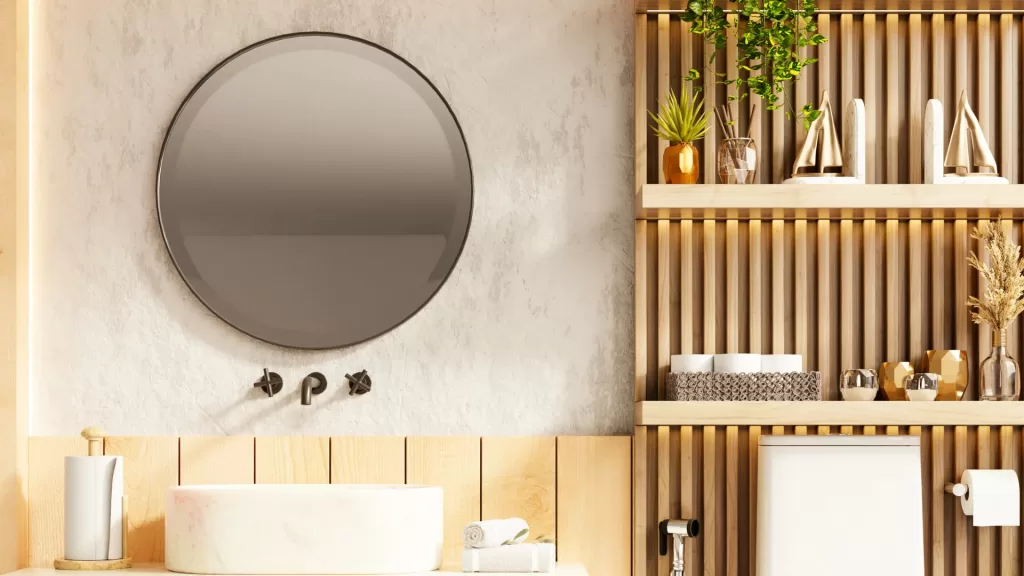
Choose a style that complements your room’s architecture: frameless and beveled for modern minimalism, ornate gold or carved wood for traditional spaces, arched mirrors to soften angular rooms, and rectangular or oval pieces to control sightlines. If ceilings are under 9 feet, pick horizontal proportions to broaden the room; for tall ceilings, vertical mirrors in 24″x48″ or 30″x60″ sizes emphasize height and drama.
Tips for choosing frame colors and finishes
Match frame tone to your room’s palette and lighting: warm metals (brass, aged bronze) pair with 2700-3000K warm lighting and honey woods, while chrome and nickel suit 3500-4000K cool whites and gray schemes. Use thin black or gold frames (1-2″ wide) for a modern look and thicker wood frames (2-4″) for traditional rooms; finishes should balance contrast and cohesion with existing finishes.
- Match the frame’s undertone to dominant woods-walnut with warm oak, ash with bleached maple.
- Pick frame width proportional to mirror size: 1-2″ for small mirrors, 2-4″ for large statement pieces.
- Choose satin or matte finishes in high-traffic areas to hide fingerprints; polished metals work well in low-touch entryways.
- Knowing that using one dominant metal and a single accent metal (e.g., brass frame + chrome lamp) creates layered cohesion without visual clutter.
You should test samples before committing: tape a 24″x36″ kraft paper mock-up to see scale, hold metal swatches against the wall at different times of day to check color shift, and place a small mirror near lighting fixtures to evaluate glare. For rentals or budget updates, spray-paint an old frame (use bond primer + satin spray) to match your palette; a $20 refinish can change the room’s perceived style.
- Bring paint, fabric, and flooring swatches to compare against the frame in natural and artificial light.
- Inspect frame samples at morning and evening light to spot warm/cool shifts that affect skin tones and art colors.
- Choose protective coatings on painted or gilt frames in humid rooms to prevent peeling.
- Knowing that slightly warmer frame tones reduce stark contrast on bright white walls and minimize perceived glare.
Creating Illusions of Space
How to strategically place mirrors
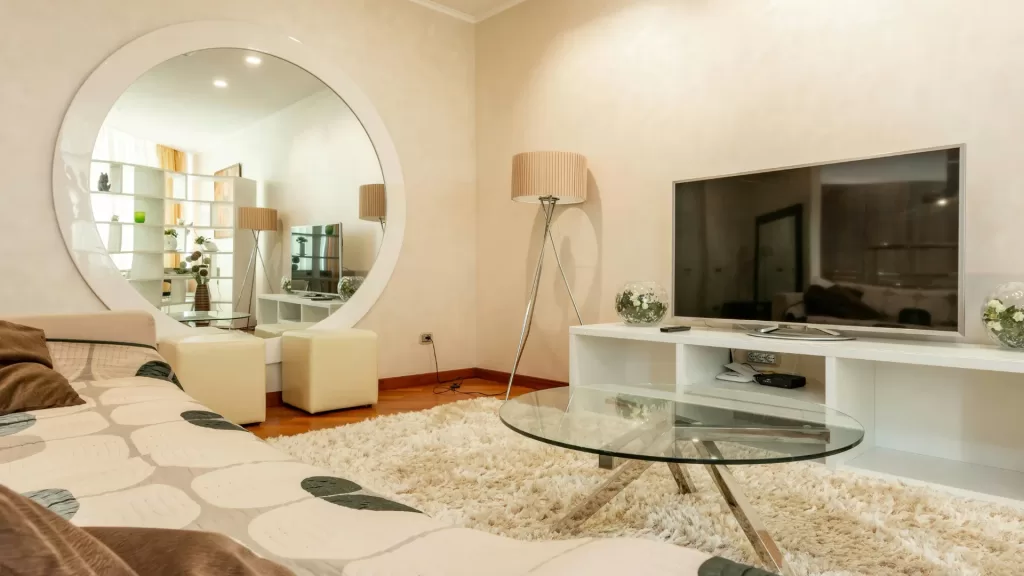
You can amplify light and depth by placing mirrors where they capture a strong focal source: opposite a window to bounce daylight across the room, beside a doorway to extend sightlines, or behind a lamp to increase perceived luminance. Hang a mirror 6-12 inches above a sofa or console, angle a small mirror at about 30-45° to reflect an architectural detail, and use a tall, vertical mirror to add up to several inches of perceived ceiling height in compact rooms.
Tips for using multiple mirrors effectively
When combining mirrors, think like a designer: use odd-number groupings (three panels often read as intentional), keep consistent spacing-4-8 inches for wall clusters-and match scale to the wall plane so the reflective field reads cohesive. Try three 24×36-inch mirrors spaced 6 inches apart to simulate a continuous reflective surface, or place two slim vertical mirrors on facing walls to create a tunneled depth that guides the eye through the space.
- Favor odd numbers for visual momentum and avoid mirror clutter.
- Maintain 4-8 inches of spacing to read as one larger plane rather than scattered pieces.
- Recognizing that frame style and glass quality determine whether the effect feels intentional or accidental.
You can push the effect further by varying scale and orientation: mix a large central mirror with two smaller flanking pieces, rotate one horizontally to widen a narrow room, or use staggered heights to simulate layered depth. In apartments, a 3-piece layout (one 36×24 center flanked by two 18×24) increases perceived width by aligning reflections with sightlines and furniture axes, creating a unified visual field that feels significantly larger.
- Anchor mirror groups to furniture or architectural lines to avoid floating compositions.
- Use matching or deliberately complementary frames to control style and perceived continuity.
- Recognizing that placement relative to windows and entry paths determines how effectively mirrors expand space.
Avoiding Common Mistakes
Factors to consider when placing mirrors
When placing mirrors, focus on light, sight lines and scale: avoid positioning directly opposite windows where midday sun creates glare, and don’t reflect clutter or TVs that halve perceived space. Aim to hang the mirror center at about 57-60 inches from the floor; for a small 8’x10′ room a 3’x5′ custom-cut mirror on the long wall can visually double depth. Knowing how these elements interact prevents common placement errors.
- Natural vs. artificial light – balance to avoid hotspots
- Sight lines – reflect attractive features, not mess
- Scale – mirror width should often be 60-75% of the wall or furniture it complements
- Height – center roughly 57-60 inches for typical viewing
- Safety – use tempered glass and proper anchors for heavy pieces
Tips for ensuring practicality in mirror placement
Prioritize practicality by matching mirror size and mounting to use: for dressing you need a full-length mirror at least 48 inches tall with 12-18 inches clear in front, while accent mirrors can be higher for visual lift. Choose anchors rated 50-100% above the mirror weight, and select low-iron glass if color accuracy matters in small spaces. After you confirm hardware, clearance and daily use patterns, commit to the final position.
- Mounting – French cleat or heavy-duty anchors for mirrors over 20 lb
- Clearance – leave 12-18 inches of walking space in front for full-length mirrors
- Glass type – low-iron for true color, regular for budget solutions
- Maintenance – access for cleaning and dusting behind wall-mounted pieces
More practical details help you avoid retrofit headaches: a 36″x48″ mirror (approx. 20-30 lb) typically needs two anchors or a cleat, while a mirrored wall panel requires Z-clips every 24 inches; in bathrooms use moisture-resistant backing and 100% silicone at edges to prevent delamination. Consider testing reflections at peak daylight and evening lamp levels before drilling. After you verify sight lines and secure hardware, add edge trim or bumpers to protect finishes and people.
- Weight guideline – two anchors for 20-35 lb, three or more for heavier spans
- Bathroom installs – moisture-rated backing plus silicone sealant
- Large installs – Z-clips or continuous French cleats spaced every 24 inches
- Final checks – verify reflections at different times of day before permanent fixing
Maintenance and Care
You should schedule simple upkeep to keep custom-cut mirrors performing and looking larger over time: dust weekly with a microfiber cloth, deep-clean monthly, and inspect mounts and sealants every 3-6 months. For bathrooms, control humidity under 60% with ventilation or a dehumidifier; in kitchens, avoid direct steam and grease exposure. Small, regular actions prevent moisture damage and extend reflective quality for years.
How to keep mirrors clean and streak-free
Use a 1:1 mix of distilled water and white vinegar in a spray bottle for general cleaning, or plain distilled water for silver-backed pieces; avoid ammonia or bleach. Wipe with a soft microfiber cloth, using horizontal strokes for large panes and a squeegee top-to-bottom on full-length mirrors. Dry edges immediately to prevent moisture seepage into the silver backing.
Tips for preserving the lifespan of custom-cut mirrors
Seal exposed edges with a neutral-cure silicone or edge-protecting tape, especially for mirrors near showers or sinks. Mount using hardware rated for the glass thickness-6-10 mm for most wall mirrors-and leave a small gap from wet surfaces (3-6 mm). Inspect the silvering and backing annually; early intervention can avoid full re-silvering.
- Keep humidity below 60% in bathrooms and use exhaust fans rated for room size.
- Choose stainless-steel or brass hardware to resist corrosion in humid areas.
- Knowing that moisture-driven silvering failure often appears first at the edges, address any blackening promptly.
You can also protect mirrors by controlling environmental stressors: avoid hanging directly above stoves or radiators, which introduce heat cycles that can delaminate coatings, and limit prolonged UV exposure by using UV-filtering films on south-facing windows. For large custom panels, use multiple mounting points every 16-24 inches to distribute weight and reduce flexing that leads to cracks or backing detachment.
- Apply a thin bead of neutral-cure silicone at cut edges when installing near wet zones to block capillary moisture.
- Store spare mirrors vertically on padded racks at a 5-10° angle to prevent warping and scratching.
- Knowing that professional re-silvering typically restores reflectivity for 10-25 more years, plan maintenance budgets accordingly.
Final Words For Your Mirror Placement Secrets
Taking this into account, you can use custom-cut mirrors to double perceived space by aligning them opposite windows to amplify light, placing floor-to-ceiling panels to create depth, and angling smaller mirrors to reflect key sightlines; choose frameless or thin-framed pieces and mount at eye level to maintain proportion, and coordinate finishes so your design reads cohesive while maximizing brightness and visual expansion.